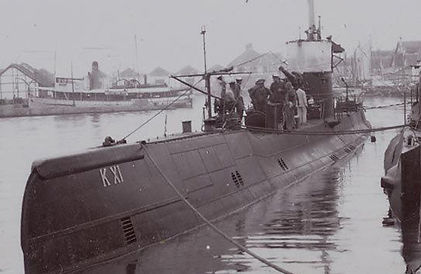
HNLMS K XI - World War 2 Submarine
A post-World War One era Dutch Navy submarine commissioned in 1924 and scuttled in 1946 in deep water off Perth, Western Australia. Located in 38 metres of water at position S 32° 09.023' E 115° 29.968' (wgs84 DD°MM.mmm'). Steel construction at 66.7 metres in length and listed at 699 tons submerged.
The History of the K XI:
The K XI or K 11 was the first of her class of K XI submarines ordered by the Dutch Netherlands Navy in 1919. The K XI class submarines, the K XI, K XII and K XIII superseded the K VIII class submarines and were predassesors to the K XIV class. The K XI had its keel laid in 1922 at the Fijenoord shipyard and was commissioned in the Dutch Royal Navy in 1924. The "K" designation for all K class submarines represented "Koloniaal" as this class of submarines were built for the purpose of serving in the Dutch colonies of the Dutch East Indies.
At the onset of the Second World War and the declaration of war against the Japanese by the Dutch on the 7 December 1941, 7 hours after the USA, the Dutch submarine fleets were stationed at Soerabaja. Three days after the declaration of war in December 1941 the K XI attacked Japanese landing forces off Malaya and patrolled the South China Sea until February 1942 without any further aggressive action. As Japanese forces landed on the Dutch East Indies, the K XI was ordered to flee to Colombo, Sri Lanka. During the transit to Colombo, the K XI rescued 13 survivors of the HMAS Yarra that had been attacked by a fleet of Japanese cruisers south of Indonesia and northwest of Australia while escorting merchant ships fleeing to Fremantle.
Upon arrival in Colombo the K XI was placed under the command of the British Admiralty and was used for patrolling and escort duties until it was relocated to Fremantle in February 1945 and placed into US operational command. Three months later the K XI was deemed obsolete. Her crew were assigned elsewhere; the submarine was decommissioned and handed over to the Royal Australian Navy and the Australian Disposal Committee to be sold as salvage.
Referenced from the full account of the K XI operational history at:
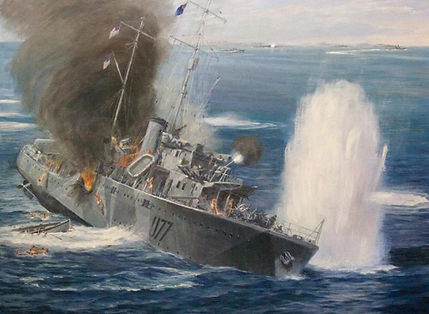
"At 6.30 am on 4 March, as the sun rose the lookout in Yarra sighted the unmistakable topmasts of a Japanese heavy cruiser squadron to the north-east. The squadron consisted of Atago, Takao and Maya, each armed with ten 8-inch guns, and two destroyers. Immediately Lieutenant Commander Rankin made a sighting report, ordered the ships of convoy to scatter and, placing his ship between them and the enemy, laid smoke and prepared to engage. Yarra was outgunned and out-ranged, and the enemy ships were faster. Against such odds her task was hopeless, yet she kept fighting even as her convoy was overwhelmed and sunk, ship by ship."
www.awm.gov.au/articles/encyclopedia/yarra/loss
"The first lieutenant, Lieutenant Commander Francis Smith RANR, passed the order to abandon ship and an estimated 34 men of Yarra’s crew of 151 entered the water on two Carley floats. One man however refused to abandon ship. Leading Seaman Ron Taylor heard the order, and directed his two surviving guns crew to the rafts, but remained at No. 2 gun firing slowly, but defiantly, at the enemy until he was killed shortly before the ship sank at about 1000."
"The Yarra was the only ship left and we could see flames and a great deal of smoke. The two destroyers were circling Yarra which appeared stationary and were pouring fire into her. She was still firing back as we could see the odd gun flashes.
The last we saw of Yarra was a high column of smoke – but we were all vividly impressed by her fight."
www.navalinstitute.com.au/4-march-1942-hmas-yarra-fights-to-the-end
The Last Fight of the Yarra:
"Rankin ordered the convoy to scatter and turned YARRA towards the enemy in a vain attempt to delay them long enough to allow the convoy to escape. YARRA was out-gunned and outranged as the cruisers stood off and sank the convoy one by one. By 0800 only YARRA was left; drifting helplessly after shells had wrecked her engine room. Two of her guns were out of action and many of her men lay dead or wounded.
Lieutenant Commander Rankin ordered “abandon ship”. Shortly afterwards a salvo of shells hit the bridge killing Rankin and all on duty there."
www.navyhistory.au/lieutenant-commander-r-w-rankin-of-hmas-yarra
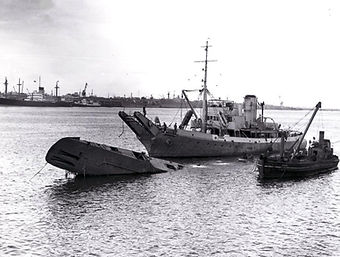
The KXI refloated and ready to be scuttled with the Agnes alongside - Fremantle 1946.
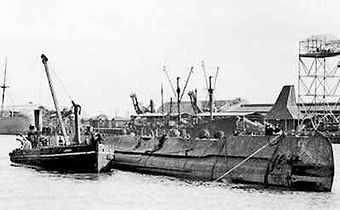
The K XI with the bow refloated at North Wharf - Fremantle 1946.
The Scuttling of the K XI:
After decommissioning the K XI was sold to the New York Junk Company for salvage and dismantling. In late January 1946 the submarine was towed from Fremantle Harbour upstream of the Swan River to the Royal Freshwater Bay Yacht club jetty where there were appropriate facilities for the dismantling of the submarine. The submarine was almost completely stripped except for its two 1200 hp M.A.N two stroke diesel engines, ballast, electric motors and battery banks. It was then towed back to Fremantle Harbour to have the larger machinery removed on the slipways in March that same year, on the 28th of March it was tied alongside the Dutch destroyer Kortenaer. At 10pm that evening the Kortenaer was found to be heavily listing, it was determined the K XI was sinking and pulling the destroyer over. The lines were cut to the K XI and it sank to a depth of 14 metres off North Wharf in Fremantle Harbour.
On the 3rd of April, Bell & Sons Salvage Company diver Hillary Malone began work to refloat the submarine, sighting 310 plugs and fittings to seal the bow area of the sub and to stop water ingress, with hopes to float the bow enough to be able to relocate the sub further upstream and complete the work refloating the vessel. This however failed and with pumps running and compressed air forced into the stern of the submarine, it was found to have many more leaks, mainly through its rivets and the aft torpedo tubes left open. With diver Hillary spending weeks working in the confined area only accessible via the small aft hatch plugging leaks, eventually, after months on the seafloor, on the 28th of June at 2:30am the sub refloated.
The K XI was proposed to be towed out to Stragglers Rocks and scuttled on the 18th of July, this however did not occur until mid-September 1946 and the K XI was reported to be towed out to the Rottnest Graveyard by the tug Agnes and sunk in a position of 32°03'S 115°22'E, almost 15 kilometres from its actual position.
Referenced: Sail, Steam and Storms. ISBN: 9781876465131 P255,256 P.Worsley and J Green
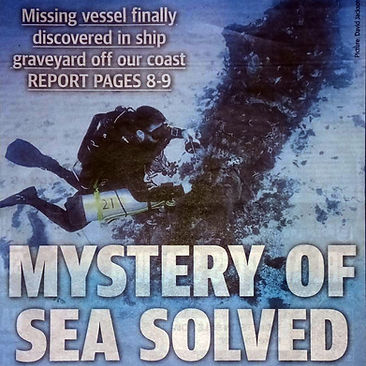
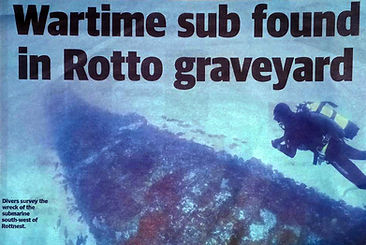
The discovery:
On New Years Day 2025 the K XI wreck was succesfully located and dived for the first time by three divers Andrew Oakley (WreckSploration) David Jackson (Diving Western Australia's Shipwrecks, Maritime Archaeological Association of Western Australia) and Patrick Morrison (WA Museum, Maritime Archaeological Association of Western Australia) diving targets from survey data provided to WreckSploration by Alisdair Cooke (Maritime Discovery Group).
The Maritime Discovery Group had completed aerial magnetometer surveys of the areas west and south of Rottnest Island identifying numerous magnetic anomalies on the seafloor, potentially identifying large masses of iron to an accuracy within a 400 metre radius. After previous survey dives had only turned up natural reef topography in the area, on 1st January, after returning from investigating another site, it was decided to run the transom mounted side scan unit on the Divingwawrecks boat over the area. After little result, finally at 130 metres and 085° of the magnetic anomaly's position, an elongated target was located appearing to be another natural feature. The target did not bare the features of a typical shipwreck similar to the scuttled sites off Rottnest. Upon a quick dive inspection, the unusual target that was likely thought to be a reef was discovered to be the sought-after wreck of the K XI. The submarine was found sitting upright on the seafloor over 15 kilometres from where it had been reported to be scuttled and where remote sensing efforts had been focused over the last few decades.
After the initial dive locating the site, on January 11 onboard Southern Image operated by Image Dive and funded by the Dutch Government, the full Wrecksploration team assisted by Matt Kwan and David Jackson conducted a full site survey and photogrammetry model of the site for formal identification by the WA Maritime Museum. On February 19 after identification was complete, the Wrecksploration team launched a formal press release advising the public of the discovery of the K XI which made international news and has now led to the K XI submarine site becoming of immense value to the people of the Netherlands and Western Australia, the Perth diving community, local independent divers and charter boat operators.
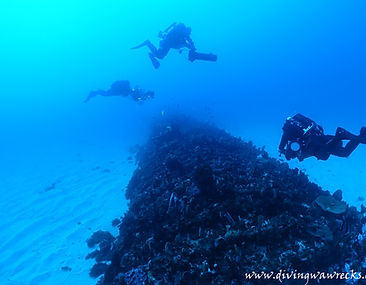
The Wrecksploration team at work surveying the K XI and collecting over 6000 images of the wreck to build their 3D photogrammetry model
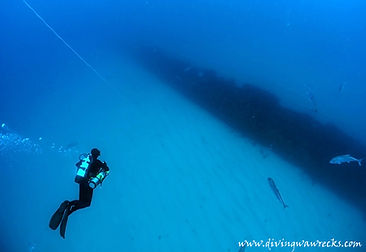
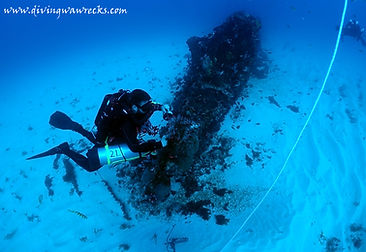
The first descent onto the unusual sonar target 01.01.25
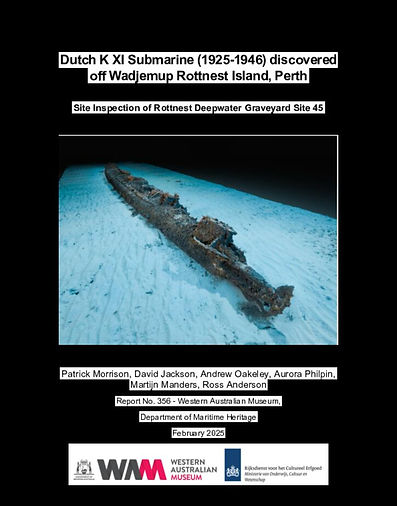
Download and read the Western Australian Museum report on the Dutch K XI Submarine at:
Follow the link below to check the Wrecksploration team's links to their photogrammetry model on the K XI. Take the time to check out the highly skilled deep survey work that the Wrecksploration team do, completing survey work and photogrammetry at depths often exceeding 100 metres and their success in recording and assisting the WA Maritime Museum to Identify scuttled wrecks that were purpose sunk in the deep waters of the Rottnest Island Graveyard. Read about the team, sponsorship, affiliates and more at:
The Wrecksploration.au 3D photgrammetry model animation. Also viewable as an interactive model through the website link attached
See Patrick Morrison's production
on the discovery of the K XI.
Patrick is a Maritime Archeologist and assistant curator at the Maritime Museum of Western Australia. He is one of the three divers who first located the site and dived the site on New Years Day in 2025 onboard the Divingwawrecks boat. The 15-minute-long production is an excellent account of the discovery, identification and history of the K XI. It features interviews with WA Museum archeologists and their roles in the discovery as well as contributions from Wrecksploration and Divingwawrecks. It recognises the contributions of the Dutch Government in funding and Maritime Discovery Group for the dataset that lead the divers to the location. It also has some cracking footage of that first moment the team realised they'd discovered the K XI.
Getting there:
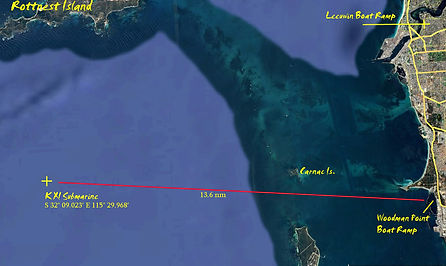
The K XI was scuttled 8 nautical miles west of Carnac Island and 7.8 nautical miles south of Rottnest, making Woodman Point the closest boat ramp to access the site. From Woodman Point it is a 13 nautical mile trip, otherwise the next closest boat ramp would be Leeuwin Ramp in the Swan River. The site is exposed and requires good weather to visit from a recreational vessel. Generally, a light wind and low seas before the sea breeze would be ideal, and with enough confidence that the weather will hold for the duration of the transit to the site, the dive and the hour-long trip back to the boat ramp. The most important consideration to remember is that the site is exposed with no land mass nearby to offer any protection from the prevailing conditions. This should be considered for the duration of the dive if there is any decompression obligations, if conditions change top side, the ability to respond to any emergency or deteriorating conditions will be limited and unachievable.
Should any emergency occur, divers should be aware that it is over an hour to return to shore or receive help from any land-based emergency services. Divers and skippers should be prepared accordingly and take proper precautions to mitigate risk when diving so far offshore. Fremantle Sea Rescue (VN6DI) is available on VHF channel 73 and 16 for distress and calling. It is always advised to log on and log off when departing and returning from any boat ramp.
When diving on the site it is best to avoid anchoring on or near the site. It is an offence to knowingly anchor and disturb or damage any protected heritage wreck in Western Australia. It is illegal to try to "hook up" to the wreck and it only deteriorates the site and diminishes its value for generations to come. The best practice for visiting the site is to drop a shot line on the wreck and live boat with divers entering the water and a skipper to stay on the vessel motoring just off the shot line. As divers descend, the shot line can be placed off to the side of the wreck if it has made contact. Anchoring in good conditions could be achievable however the vessel would have to anchor away and upwind from the wreck and let out scope to position above the shot line. It is certainly not a site worth taking chances on, given its distance offshore and the delays involved in requiring assistance in an emergency. Leaving a vessel unattended is not advisable, especially if decompression diving is taking place and the restrictions in being able to respond to an emergency or lost anchor would result in lives being put at risk. If a diver was carried away by current or unable to make it to an unattended vessel it is unlikely that recovery would be possible due to the response times for search and rescue.
Since the discovery of the site, a number of charter operators have been visiting the site due to the excellent amount of public interest. Image Dive run trips regularly to the site and Perth Scuba, UWA Dive Club and Bucket list Diver have all run trips to the wreck since its discovery.

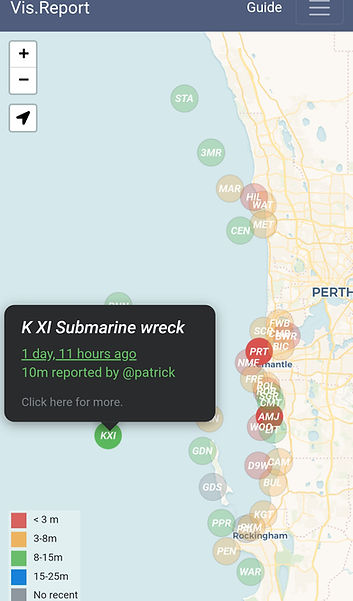
the K XI is live on vis.report and conditions can be checked before visiting the wreck at the link below:


Diving the site:
The site itself is not a challenging dive in terms of navigation, the wreck lays on a 300° north-west to southeast axis with the bow facing the northwest and is surrounded by sand. It is a difficult site to get lost on.
We've dived the site in 2 metre swell and 1 metre swell, interestingly the high swell days of diving produced better visibility, although this would not be the rule. Visibility should generally be good on the site and be on the better side of 10 metres to 30 metres. Current has been noted by others on the site running east to west and due to the site not being dived that extensively, divers should be cautious of any unexpected conditions or currents that may occur while visiting the wreck.
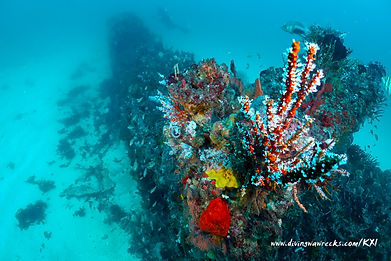
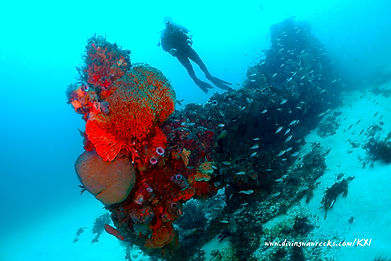
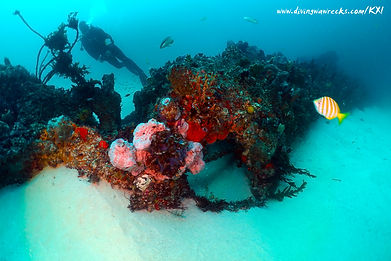
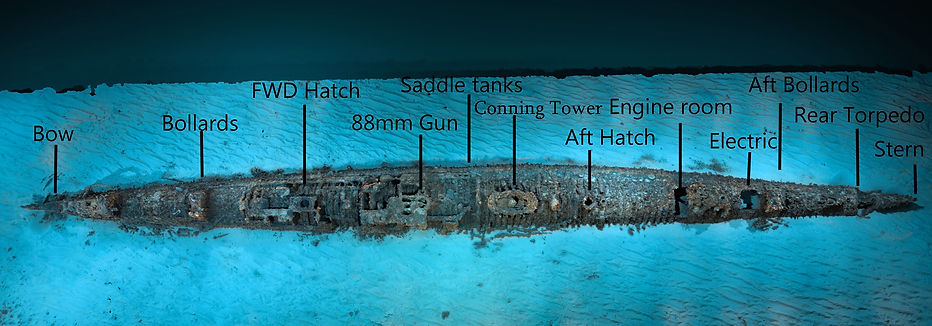
Central to the wreck is the large oval shaped flange like structure, this is where the conning tower was removed. This provided one of three access points for crew to enter the pressure hull that would house the crew, machinery and living spaces, this pressure hull spans the length of the submarine. The external blister or second hull a top the pressure hull seen in the historical images has corroded away after 80 years on the ocean floor. Aft of the conning tower is another crew hatch visible in the video at the top of this page and further towards the stern are two sections of the hull cut open exposing the internal structure of the vessel. This is where the hull was cut away to remove the engines and electric motors before scuttling. Finally, right towards the stern, almost unrecognisable are two rear facing torpedo tubes right at the stern of the wreck and partially buried. It is interesting to note that historical images of the stern show the draft marks in this area displaying 3 metres above the keel, informing us that the hull has actually sunk 3 metres into the seafloor and almost 3/4 of the wreck actually extends beneath the sand. Forward of the conning tower at midship is the gun mount for the 88mm bofors cannon that is now in the possession of the Royal Fresh Water Bay Yacht Club. Forward of the gun mount is the forward crew hatch and leading towards the bow of the K XI, the four forward facing torpedo tubes are visible above the seafloor. One of the standout features for diving the site is the impressive coral growth that clings to the submarine structure that is surrouned by the desert of sand that encapsulates the site, this is another reason for skipper to avoid anchoring near the wreck. On the initial dives the site was home to large demersal fish, an abundance of crayfish and a resident Blue Grouper, unfortunately since the publishing of the discovery the demersal fish life has declined rapidly as visitation has increased on the site.
We have been advised that it is very likely that any remaining ferrous material on the wreck would have little to no structural integrity and is likely to only be held in place by the marine concretion that encapsulated the steel during its time underwater. The vessel will eventually collapse and any attempt at penetrating any section of the wreck should be avoided as it is unsafe to do so.
The challenging part of the dive is the depth and the exposed offshore location of the wreck. At 38 metres it is just inside the realm of recreational diving limits for those that are suitably trained and have the appropriate equipment for diving that depth. That said, even as a recreational dive with a 28% EANX mix, bottom times are still limited to around 11 minutes, just barely leaving enough time for one quick lap around the 66 metre long wreck with little time for stopping to look closely.
If only intending to visit the site once, it is best enjoyed as a technical decompression dive. However, this comes with a further set of risks that should be mitigated if visiting from a private vessel. Technical divers would be best suited to using charter boat operators with surface support and adequate procedures in place to accommodate technical diving.
The other Dutch Sub:
Did you know there was another Dutch submarine scuttled off Perth during the Second World War? And hundreds if not thousands of boats pass over it every week!
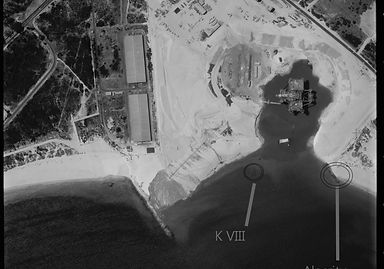
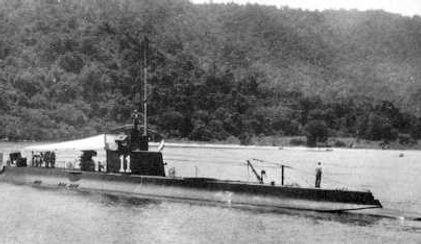
The Royal Netherlands Navy K VIII was stationed as a reserve force in Java and fled to Fremantle in 1942 ahead of the Japanese invasion of the Dutch East Indies. The K VIII class of submarines proceeded the K XI class of which the K XI was recently discovered off the coast of Fremantle in deep water. The K VIII was the first of her class, with her keel being laid down in 1917. Upon arriving in Fremantle ahead of the the Japanese advance she was already deemed obsolete by the Dutch Navy and stripped for parts. It is recorded that the conning tower was removed to fit under the traffic bridge and the submarine was towed to Perth city and her generators used to supply an emergency power supply to city infrastructure during a blackout. The conning tower was then utilised on the Fremantle Harbour pilot vessel "Lady Forrest" which is still on display in the Fremantle Maritime Museum.
In 1942 the K VIII was towed to Cockburn Sound to be dismantled, in the end she went aground 100 metres offshore in Jervois Bay. In 1957 the Submarine was deemed a hazard to navigation, and it was blasted flat with dynamite. During the mid 1970's the coastal dunes adjacent to the K VIII and the wreck of the Alacrity were utilised for the construction of the floating Oil and Gas exploration rig the Ocean Endeavour. After construction of the Ocean Endevour, the area around the towering oil rig was flooded to float the rig out to sea, leaving to K VIII to be further hidden on the seabed in Jervois Bay. In 2018 the K VIII position was triangulated from landgate imagery from the 1970's to reveal its current day position since the reclaiming of land in Jervois Bay and the construction of the Woodman Point boat ramp facility.
Today the K VIII lays buried partially beneath the sand right on the drop off, around 50 metres from the end of the finger jetties of Woodman Point Boat Ramp. If you head out to the K XI from Woodman Point, you'll have to drive right over the top of her predecessor.