
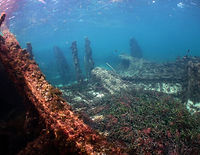
Miwok II
GPS: S 32° 00.857'
E 115° 33.558'
Location: Bickley Point, Rottnest
Site depth: 11 metres
Divable conditions: <2m swell
Visibilty: 10-15 metres
Vessel: Barge
Construction: Steel
Tons: 237 tons
Vessel length: 33 metres
Wreck event: Scuttled 1983

Virtually unknown for the last 30 years, the former crane barge that was used for construction by Hamersley Iron in Dampier, has sat in 11 metres of water east of Bickley Point practically unknown by local divers. Very little information has been available on the wreck site.


The 33 x 13 metre barge was sunk and used by the Special Air Service Regiment in 1983 after a request by the Museum for an alternative site to the RMS Orizaba for underwater demolitions training by SASR and NAVY divers.
Lady Elizabeth
GPS: S 32° 01.082'
E 115° 32.950'
Location: Dyer Island, Rottnest
Site depth: 8 metres
Divable conditions: <1.0m swell
Visibilty: 10-20 metres
Vessel: Barque
Construction: Composite Wood/Steel
Tons: 658 tons
Vessel length: 48 metres
Wreck event: Wrecked on reef 1878


On the 25th of June the Lady Elizabeth begun its fateful journey departing Fremantle for Shanghai heading out to sea in less than ideal weather. The barque had cleared Rottnest and was well out to sea when in bad weather the ship was beaten back south on its voyage and on the 30th the Captain decided to turn the ship around and head back to the safety of Fremantle. On returning to port a crew member was lost overboard and in the poor conditions a boat could not be launched to effect a rescue. During the evening the Captain sighted what he thought was Parker Point and attempted to sail the ship through south passage in the failing light, shortly after the vessel struck the reef near Dyer Island and begun to break up and lose its cargo.


The wreck of the Lady Elizabeth lays in around 9 metres of water on the western side of Dyer Island. Two thirds of the wrecked composite built barque are located on the sand extending southward with the stern hard up amongst the nearby reef. Being on the south side of the island and adjacent to a number of nearby breaking reefs the Lady Elizabeth is best dived in a low swell under a metre and in an easterly wind. The site is generally regarded to have great visibilty sometimes up to 20 metres.
Shark
GPS: S 32° 00.824’
E 115° 32.487’
Location: Bickley Bay, Rottnest
Site depth: 2.5 metres
Divable conditions: <1 metre Swell
Visibilty: 2-8 metres
Vessel: Barge
Construction: Steel
Tons: Unknown
Vessel length: Unknown
Wreck event: Set adrift and grounded


One of the most accessable wrecks on Rottnest, the Shark lies just off the beach in Bickley Bay easily visible from shore. The Hopper Barge was adrift from Fremantle when it went aground on the south side of Rottnest in 1938.


The Shark makes for an easy snorkel in good conditions. For visibility to be good, a few days of low swell and offshore winds give the site a chance to clear up. Given its close proximity to the beach that is exposed to the ocean swell the site can stir up very easily and it is most comfortably snorkelled in a swell under a metre. This is also to avoid any surge around the jagged rusting edges of the shallow wreck.
Salmon Bay
Unidentified
GPS: S 32° 01.774'
E 115° 30.173'
Location: Salmon Bay, Rottnest
Site depth: 26 metres
Divable conditions: <1.5m swell
Visibilty: 10-25metres
Vessel: N/A
Construction: Iron
Tons: N/A
Vessel length: N/A
Wreck event: Unknown


Kiryo Maru I
GPS: S 32° 01.225'
E 115° 26.960'
Location: West End, Rottnest
Site depth: 4 metres
Divable conditions: <0.5m swell
Visibilty: 5-10 metres
Vessel: Steel Tuna Longliner
Construction: Steel
Tons: 200 tons
Vessel length: 35.7m
Wreck event: Wrecked on reef

The Japanese owned Kiryo Maru I was a tuna longliner that was heading towards Fremantle in the early hours of the 3 of August 1984. At around 3am the Longliner lost propulsion and went hard aground on the reef shelf adjacent to Cathederal Rocks. Attempts were made to salvage the catch and fuel on board the vessel but due to the unrelenting southern ocean swell the vessel could not be re-floated.


Image: Australian Fisheries Magazine. Vol 43 no.8 Ausgust 1984
The main wreck site sits beneath dangerous breakers and is only accessible in very low swell less than 0.5 metres. Nearby at Cathedral Rocks near a population of New Zealand fur seals, some small and scattered pieces of wreckage can be seen as a debris field on the seafloorat a depth ranging from 2 - 9 metres. The channel at Cathederal Rocks should only be entered in low swell conditions.
Other wreck sites with little remains on the south side of Rottnest.
The Raven site sits just south east of Dyer Island, the Raven was lost in 1891 and very little remains of the wreck besides some hull sheathing, fastenings and ballast stones spread around hidden by kelp on a flat reef seafloor . A museum plinth is placed nearby at 32° 01.197' E 115° 33.196'
